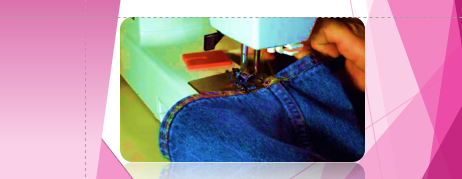
• How to Setup a Top Loading Bobbin

    "Before buying a sewing machine, of course, you will focus on finding various information about the advantages and disadvantages of the sewing machine..

  • How to Create a Safe Crib

    What should be grateful for, the presence of the baby in the family makes the atmosphere .

  • Sew a Fabric Tab End on a Zipper!

    Slice a piece of textile that measures 1 3/4 " (4. 5cm) N x 4" (10cm) They would. Press 1/4 " (6mm) to an incorrect side on both short ends of the fabric piece.

  • Sewing Machine Needles

    Learn how to recognize the many types of standard, decorative, and special-purpose machine needles. Discover what they are all best for, and how to troubleshoot problems

  • Tips Sewing Denim

    Denim is one of the most popular fabrics and this fabric is very synonymous with jeans..

Showing posts with label Tips And Tricks Sewing. Show all posts

How to Setup a Top Loading Bobbin

Before buying a sewing machine, of course, you will focus on finding various information about the advantages and disadvantages of the sewing machine. One of the information you need to know is about using top loading bobbin or front loading bobbin. In my experience the easiest is to use a top loading bobbin.

source : google.com


Difference between top bobbin and bottom bobbin

Top Bobbin

- transparent, easy to see

- easy pairing

- there is no thread house


Botton bobbin

- not transparent, so if it runs out, it's hard to see

- The pair is difficult, you have to open the table, dig into it ...

- there is still a thread house

Although both have their advantages and disadvantages with each other, for beginners I would recommend using a top loading bobbin for the features available on the sewing machine that is going to be purchased. Why ? because the top loading bobbin can simplify your work later without the need for an additional bobbing cassing installation place because it is included in the top loading bobbin itself.

The way to use this top loading bobbin is as follows:

1. Prepare the spool of yarn that will be used.

2. Open the lid of the top loading bobbin on your portable sewing machine.

3. Link the yarn with the portable bobbin cassing

4. Pull the lower thread using the upper needle.

Use one hand to hold the top thread. Then use your other hand to turn the handwheel toward you until you see the needle start moving to the part of the needle plate and start picking up the thread below it.

Happy sewing
Share:

The Best of Sewing Machines 2020

Towards the end of this year 2020, in the following post we will present the best sewing machines we have ever used in the simple sewing business in our shop. Maybe for beginners this machine can be one of the main choices in opening a sewing business.

source : google.com

Of the various models available at that time, portable or manual sewing machines were still worth buying according to the needs and businesses that were being worked on. Automatic machines that use electricity as the main supporting medium in the sewing process are worth updating. Likewise, the preparation of a manual sewing machine that does not use electric current as the main source is also worth preparing at least, one of which is to support the smooth running of the sewing process when the electric current is problematic.

For portable models and small businesses at home, we recommend the Janome machine with the x220 type. Where for beginners I highly recommend this machine because besides being resistant to the sewing process in a rather thick area, this machine is also equipped with 22 stitch models that can be an option for beginners who are just learning to sew. With this Janome x220 machine, it is very easy to use for sewing clothes or making hijabs. This machine supports a variety of sewing shoes, ranging from regular or straight shoes, seams, zig zag shoes, button shoes, buttonhole shoes, elastic rubber shoes, shoes for sewing bisbans as well as several other shoe functions that are generally used to make it easier for tailors. in using this simple model sewing machine. The price ranges from $ 187.

PRODUCT DESCRIPTION

Janome portable sewing machine 2200xt new 2020 included hard cover household sewing machine

Type: 2200xt Best Beginer

watts: 60

Brand: Japan

Assembly: THAILAND

The 2200XT sewing machine is equipped with several accessories, such as: Zigzag Foot, Satin Stitch Foot, Blind Hem Foot, Foot buttons, needles and many more Large fabrics and some can be sewn easily using the Janome 2200XT. In addition, this machine is also easy to carry. Lightweight.

The Janome 2200XT machine is highly recommended for all types of fabrics, this sewing machine can also be used for beginners and advanced because this machine is very easy to use by all people.

Share:

How to thread a sewing machine?

Sewing machines are the key to making clothes. We can easily now find on the market various models of sewing machines to suit any budget. From the ideal sizes for small machines, to the most sophisticated, with a wide range of profiles, in fact they all have one thing in common: thread and needle.


The first step is to identify the type of machine you have. whether a manual machine or already using a portable sewing machine. although the location and shape are sometimes a little different, but in essence everything has been made and set with almost the same goals and directions.

source : google.com

On today's portable machines, we only need to follow the instructions and the direction of the thread entry according to what has been made in their respective sections. so there is no way it will go wrong if we follow according to the instructions.

Usually the thread guides are simple, made of metal, and are positioned at the top of the machine before the thread passes before reaching the needle.

Before starting to use it, the machine must be observed in an offline condition. it is important to unplug the machine from the outlet like this janome x220 machine.


Share:

How to Make a Hair Scrunchies

This simple hair tie is very easy to make. By choosing a hair tie that matches your outfit, you will look more fashionable in your outfit.


When we work according to passion, it makes us work comfortably. Moreover, the work we do can make the heart itself and those around us happy. The advantage of sharing this pleasure is that we will get a side stage that can become our business capital at work.

Where did the idea to make this hair tie come from? Of course this is just a dream of my wife who wants to make her own hair tie from the leftover material for sewing the hijab in my shop. Then I try to practice the desire of the wife in a simple project for my wife. Hopefully besides being fun, later this simple hair tie can make my daily additions from a tailor.

Making this simple hair tie can use a sewing machine or you can use glue if you can't use a sewing machine. it is very simple and easy because of how to make it. But in this tutorial, I will only share how to make a hair tie using a sewing machine ... ^ _ ^

The easy way to make a hair tie from this patchwork material is as follows:

1. Cut the fabric, length 150 cm, width is 18 cm


2. Unite the ends of the ends, then sew the sides and leave about 2 cm for the part that will be inserted in the elastic.


3. Pull the right side out. Put a safety pin on one end and tie the pin through the inside of the tube and pull it out at the opposite end.


4. Attach an elastic pin to one end and pull it until it meets the other end. then sew both of them


Finally tie the signs can be used.....Goodslook. ^_^


Share:

How to Create a Safe Crib

What should be grateful for, the presence of the baby in the family makes the atmosphere more colorful. As a sense of gratitude, it is very appropriate for us to prepare a comfortable place for him. One of them is by making a baby box.

source : pinterest.com

Baby crib is a special place made for babies to sleep and play. besides convenience, for the safety of the baby is one of the reasons for making this baby box. In its use, the baby box is used from birth to 3 years old. For the comfort of the baby, please pay attention to the size of the area of ​​this box, because if it is too narrow it will make it difficult for the baby to move. Maybe as a guide here I suggest making the size 60 - 70 cm. The box must be made not tenuous. so that the baby's head does not get caught.


For Create a Safe Crib, what must be considered are:

- The fabric has soft and strong characteristics.

- Using a waterproof mattress

- The mattress used should not be too soft. because it can make the baby drown.

- Make sure the cloth used is free of toxic materials.

- Use a mosquito net whose length is bigger than the box.

Share:

Sewing Tools and Supplies are Very Important

Sewing is a creativity that needs development, not only developing creativity and ability in sewing, but also need tools or tools for sewing so that we are more productive and optimal in producing stitches.

When we start learning how to sew, it will be very tedious and it costs a little bit to buy a sewing kit. Choose the sewing tools you need and create your own sewing kit.


The sewing tools that need to be prepared are as follows:

1. Sewing Machine

Sewing machine is the main tool for opening a sewing business. There are portable models and some are still manual. depending on our ability to buy it as needed.


2. Manual Book 

The sewing machine manual book is the most important tool that you must have in sewing so that you can get knowledge about the sewing machine you are using. With this sewing machine manual book, it will be easier to find out some functions for using a sewing machine.

In function, all sewing machines may be the same between portable sewing machines and manual sewing machines, but to understand the capabilities of your sewing machine, you need a manual.

3. Sewing machine Foot


In some sewing jobs, we need to have some sewing machine Foot that we can use to adjust the stitch results to the model and motif that suits our needs. By default, straight sewing is the main requirement, but apart from that, there are several stitch models that we need to use sewing shoes for. One of them is if we use stitch motifs for zig zag, attaching shirt buttons, making button holes, or sewing the edges of the hijab according to the desired motif.

Shoes on portable sewing machines have various types and functions.

4. Sewing Meter

Measuring clothes meter is also one of the most important things in sewing, this tool is very useful for determining the size desired by your customer. Short and long stitch results depend on the initial measurement. So the measurement must be really accurate and certain so that the stitch results are in accordance with what you want.

Clothing measuring meter Very useful for work in the fashion, tailor or clothing industry, to measure the material to be cut, sewn or measure the body.

5. Seam Ripper

The habit of beginners who are learning to sew is the occurrence of errors in the sewing process. To avoid mistakes in repairing stitches, this seam ripper is needed. Use the Seam ripper to remove unwanted stitches.

The smooth seam ripper tip allows you to select single threads, while the rounded end allows you to untangle the stitch along the seam without tearing the fabric. From this sewing repair experience, later you will easily understand how to use the correct seam ripper.

Share:

How To make Face Mask Holders

The use of masks is now almost a primary need for everyone during the Covid-19 pandemic, but this need is not compared to the production of available masks, making the function of wearing masks a new problem for the wearer. One of them is an earlop mask.


Where the function of this earlop mask is very easy to use by men who do not wear the hijab, but it will be an obstacle for women who use it because it is a little complicated to use inside the hijab.


Headlop masks are easier to use for women who wear hijab. However, sometimes the production stock decreases or runs out, so it requires the creativity of tailors to solve this problem.

Now in this tutorial I will share an easy way to make a mask connector to change the function of an earlop mask to a headlop. Very easy way and all tailors can make it. and those who don't have a sewing machine can also use a hand needle to make it.

The basic ingredients for making this mask connector :

1. Clothing decorative accessories colored cotton ribbons or other ribbons

2. Shirt Button

3. Foot Button

4. Sewings


Easy ways to sew this Mask Connector are as follows:

a. Cut the Ribbon 22 cm in length ... this size is adjustable

b. Sew using a sewing machine that has been replaced with a foot button

and make sure to adjust the length and zigzag motif according to the button


c. Make sure the stitched thread is completely repeated so that the tension of the thread does not come off easily.


Share:

How to Make a Hot Glue Gun at Home

Hot glue is one of the work support devices in the sewing process. This tool is also widely used in everyday life, especially by craftsmen. This type of glue is very important and useful at a fairly cheap price to buy it. As a type of glue for crafts, it is very important before buying is to choose the type and brand as needed.


Using hot glue gun may seem simple at first, but it requires a process of care and attention to ensure the safety of making glue gun, especially if you are around children.

There are several things that need to be considered in using this hot glue, including the following:

1. Check the tension characteristics of the glue gun used,

2. Determine the type of glue gun you want to use, because one uses the thickest glue stick and another uses a thinner glue stick.

3. Be careful when handling the glue gun to avoid burns.

4. Clean the funnel, attach it to the mains voltage, attach the glue stick, wait for the glue to heat up then pull the trigger to use it

5. The heating time of this glue is about 5 minutes.

Share:

Tips for Sewing Denim 2019


Sewing Denim 

Denim is one of the most popular fabrics and this fabric is very synonymous with jeans. It takes a little trick to make this fabric more professional and its tidiness more clear.


The term "jeans" currently usually refers to the style of certain pants, called Blue Jeans. The contemporary use of the word "jeans" actually comes from the French word for Genoa, Italy (GĂȘnes) because sailors from this city are known to wear these cotton pants. Jeans are also often referred to as dungaree which means coarse cloth and is one of the few Hindi words.

Characteristics of denim


The characteristics of Denim fabric are very strong and durable. Anyone who has jeans must have known the character of this fabric.
The longer the more soft is one of the characteristics of this fabric. But in washing, we have to separate with other fabric. This is so that other fabrics do not mix with the characteristics of the color of the denim fabric.

Denim is also one of the most durable fabrics on the market.
If you need to adjust your denim or tear, you must arm yourself with high-quality threads and very sharp and strong needles. Ordinary threads and needles will not work with this strong cloth.

If you sew your own jeans from a memo, make sure you have the right tools for the job:
1. Use strong needles so that they don't break easily, whether they are made specifically for sewing denim such as the Schmetz Denim Needle, or universal needles that are at least 90/14. If denim is very thick, make it 100/16. These needles will have reinforced blades to minimize needle deflection and reduce the risk of broken needles or stitches being passed.
3. Use heavy-duty Jeans Thread, especially for topstitching associated with flat logging or if you can't find this, you can also try to stretch upholstery.
3. Use a sharp tool. This includes both using sharp professional sewing scissors and sharp rotary cutters.
Share:

Sewing-Machine Needles

Sewing-Machine Needles


Learn how to recognize the many types of standard, decorative, and special-purpose machine needles. Discover what they are all best for, and how to troubleshoot problems.

The configuration of these needles is established on this fabric to be sewn.


Universal as an example
Uses: Safest needle choice for most fabrics.
Setup: Has slightly rounded point and elongated scarf to permit almost foolproof appointment of needle and bobbin hook.
Troubleshooting: When textile is not medium-weight unique, consider needle specifically best suited to fabric. For example, size 18 universal hook ideal for heavy jeans, but size 18 denim jeans needle works more effectively.

Ballpoint and stretch needles
Uses: Ballpoint needle for heavier, looser sweater knits; stretch needle for highly elastic fabrics, like
Spandex, or Lycra.
Configuration: Possess rounded points that enter between fabric threads somewhat than pierce them. (Stretch-needle point is slightly less rounded than ballpoint. )
Troubleshooting: Test-stitch knits with ballpoint, stretch, and common needles to see which doesn't cut yarn and yields best results. In the event ballpoint skips stitches, try stretch needle.

Microtex and sharp needles
Uses: Stitches microfiber, silk, synthetic leather; precisely stitching edges; and heirloom sewing.
Configuration: Posseses an acute point.
Troubleshooting: Essentially trouble-free, but fabric might require a Teflon, roller, or even/dual-feed presser foot.

Natural leather needle
Uses: Excellent for sewing natural leather.
Setup: Has slight cutting point (almost like an arrowhead).
Troubleshooting: On synthetic leather, unless it is rather heavy simplicity of, cuts rather than pierces stitch hole and can tear leather. Most man-made leathers require Microtex or sharp needle.

Denim (jeans) needle
Uses: For top quality denim, duck, canvas, covers fabrics, artificial leather, and vinyl.
Configuration: Has much deeper scarf, acute point, and modified shaft to affix without pushing fabric down into needle-plate hole. Moves through fabric and complies with bobbin hook better on dense woven fabrics.
Servicing: If stitches skip when sewing very heavy fabric, try larger needle and sew more slowly or walk needle through textile (by turning hand crank).

Handicap/self-threading needle
Uses: Permits easier threading for sewers with vision problems.
Construction: Universal needle with slip-in threading slot at the eye.
Troubleshooting: Always take sewn piece back away from needle before trimming thread so needle does not unthread. Needle is useful on woven fabrics, but may occasionally snag knits, so test-sew to check for fabric and needle abiliyy.

Standard needles

Decorative needles

The configuration is designed to wed thread to fabric for surface decoration.

Topstitching hook
Uses: Topstitching.
Configuration: Has extra-acute point, extra-large eye, and large groove for heavy line.
Troubleshooting: Use smallest size needle that accommodates your thread to avoid striking large holes in textile.

Embroidery needle
Uses: Equipment embroidering or embellishing with decorative thread.
Configuration: Features light point (neither sharpened nor ballpoint) and enflamed eye to keep ornamental threads from shredding or breaking, and prevent missed out stitches.
Troubleshooting: If bond still shreds on compacted or heavily stitched design, use larger size as an example or Metallica needle.

Material (Metafil and Metallica) hook
Uses: Sewing with attractive metallic threads.
Configuration: Offers universal or standard point; large, elongated eye; and enormous groove to allow fragile metallic and man-made filament threads to movement smoothly.
Troubleshooting: Metallic strings are incredibly sensitive to problems in machine: Tiniest burr on thread path or needle can cause problems.


Quilting (stippling) hookUses: Piecing, quilting, and stippling.
Configuration: Has special pointed shaft to prevent harming fabrics when stitching multiple layers.
Troubleshooting: Move cloth smoothly without pulling on needle when free-motion sewing to prevent breaking filling device.
Share:

Sew a Fabric Tab End on a Zipper!

Sew a Fabric


Slice a piece of textile that measures 1 3/4 " (4. 5cm) N x 4" (10cm) They would. Press 1/4 " (6mm) to an incorrect side on both short ends of the fabric piece. *Note: the width cutting dimension is if you are utilizing a 1" (2. 5cm) wide zipper. Adjust your width measurement to suit the width of the zipper that you are using. You may also adapt the height or length you cut if you need a longer or not as long zipper tab too.


Then fold the part right-sides-together with the press edges at the top and sew a 0.25 " (6mm) seam on the 2 sides. The top is open and the bottom is where the fold is. I actually used yellow thread in the picture so you could see where you can sew, but you would want to match your carefully thread color to the cloth color when you affix your tab.


Subsequent trim off the four corners at an position and turn your part right-sides-out. Gently poke out the corners so they may be nice and square.


Provide a good press.  anda then Slip your freezer end into the little zipper tab.


Then simply you will top-stitch around all four sides about 1/8" (3mm) from the advantage. Now you have a nice zipper end to grab on to when you are zipping your zipper closed.
Share:

Start Hand Sewing Without Knotting The Thread

Hand Sewing 


Should you be still tying a knot in your thread to get started on your hand stitching, present tip will change the way you sew permanently. I used to knot my thread, and it helped me crazy that half time that knot would just draw right through, and even if it didn't, it left a lump in my garment where the knot was. Ugh. This kind of method solves the concern of loose weave textile and doesn't give you the "this was made with a third grader".


Incredibly poor choice of thread color so you can see what I'm doing.
Start by picking up 3-4 strings of your fabric with your needle. You want a tiny piece of textile, but 1-2 threads, with regards to the fabric, may be too fragile. Pull your as an example and thread through the material, leaving a thread end of around 2 inches wide.


Pull your needle around and put it again through the same spot, making sure not to move your original thread end through.

Start to take your thread through. Just before it is completely taken through, a loop will form. Thread your as an example through this loop and then finish tightening your thread. This technique works to some degree similarly to the Chinese language finger traps you can find in dollar stores. The more the bond is pulled on, the more it tightens around itself.

Once you have finished tightening this, you can trim off the excess tail. You can also use this solution to tie your thread off when you've finished stitching. No more knots, no more bumps and much less frustration.

Share:

Popular Posts

Labels

Powered by Blogger.

Labels

Recent Posts